Thursday, September 27, 2012
On the table today
Working on a treat for my niece whose due in a few weeks. Here's a peak. Lots of trimming going on, taking these hst scraps and cutting them down to 1.5in squares o_0
Labels:
gift,
hst,
quilting,
sewing,
what I'm working on
Wednesday, September 26, 2012
Table runner pt2
I received my part of the table runner swap.
It came with extras too.
I'm very happy with it, it's double sided which is great for extended use. The magazine has great patterns for later projects. There's a FQ bundle of children's prints, I'm thinking child's donation quilt. Then there's 1+ yards of dachshund print just for me. In my bio for the swap I mentioned my fur babies and my great swapee gifted me with personal extras.
Labels:
group,
swap,
table runner
Tuesday, September 25, 2012
Tasty Tuesday
Caprese Burgers with oven roasted veggies
Take the yummy Caprese Salad from the island of Capri, add it to a fresh grilled Burger smear on a touch of Pesto and get ready for Super Yum!
Clean out the fridge- oven roasted veggies
tri colored gourmet potatoes (about 6)
string beans (a hand full)
bell peppers (1/2 of 3 different colors)
mushrooms (about 6)
chop whats needed to make roughly uniform sizes, mix in a bowl with a splash of oil and Italian seasoning, pour onto foil covered cookie sheet, cook on 400 for 30 mins
Slice Mozzarella ball and tomatoes to the same thickness,
clean and pick off a few Basil leaves,
use your favorite Pesto
smear both top and bottom bun with Pesto,
stack burger-cheese-basil-tomato
serve with veggies or not
Labels:
beef,
grill,
recipe,
tasty Tuesday,
veggies
Monday, September 24, 2012
A few finishes
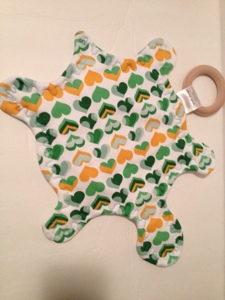
This past week or so I've been sewing away. Below are some pictures. Items are available now and if still here will go to Holiday Bazaars with me.
Saturday, September 22, 2012
Tuesday, September 18, 2012
Tasty Tuesday
Sesame Pepper Steak
In the mood for Oriental food?
Add this to a side of rice, lo mein noodles, eggrolls even.
Could be used as a fresh homemade taste to some prepackaged sides.
In the mood for Oriental food?
Add this to a side of rice, lo mein noodles, eggrolls even.
Could be used as a fresh homemade taste to some prepackaged sides.
Take out
Sesame Oil, Soy Sauce, Garlic Powder, Sesame Seeds
On Med High heat your pan, add in Sesame Oil and Soy Sauce,
no measuring, just go around the pan (write a Z or M or whatever)
Buy the pre sliced super thin beef (usually theres 3 long wide pieces) for about $5,
stack them and slice them into strips
slice up a green bell pepper
slice up a 1/4 onion
Add to hot pan
sprinkle with garlic powder and sesame seeds
cook until done
This is how the kids ate it, for myself it would be with only rice
* to be gluten free please check that you have the right soy sauce
Labels:
dairy free,
egg free,
gluten free,
grain free,
low carb,
paleo,
primal,
recipe,
Steak,
tasty Tuesday
Monday, September 17, 2012
Office chair makeover
You ever see that fabric that you "must have"?
Buy it by the yards, then it sits and sits and you never use it.
I figured out a solution.
Office chair makeover
That's right, with just a few items you can have a new chair in just an hour or so.
Take an old ugly (free in my case) chair, 2 yards of "must have" fabric, a few nails and hammer (or staple gun could work to), scissors, pins, allen wrench (or screwdriver depending on your chair) and the ability to do straight line sewing.
Here's my fabric that has been sitting, I love purple and green! This was gifted to me by my mom but I could not figure out what to do with it.

Here's my free chair from a neighbor

Here's a picture to show the hardware on the arms, super simple, 4 screws each side, no fussing under the seat at all.

This particular chair required an allen wrench
(I keep everything that has ever come in a box of furniture that needs building, so I had a few on hand)
Once you remove the arms the back is also disconnected

I placed the back on a small table, standing it straight up as if it were still attached and ready to be sat in. I then took my fabric, print side facing chair pad, tucked the back under (towards me) about 6 inches

I worked the right side first, with about 3-5 inches available to work with, I tucked and folded the top corner until I liked it, pulled the back side around and pinned it.

I then followed the side crease of the chair pad straight down, pinning along the way, stopping a few inches away from the bottom

Repeat the above to the left side
Once both sides are pinned I then trimmed the piece I tucked under earlier, I left about 3 inches, both on the back that tucked towards me and then tucked the front piece towards the back and trimmed.

Heres the back side all nice and flat, adjust your pins if needed, then pull off the "slip cover"

On to the bottom seat.
I took the remaining fabric and laid it over the seat to measure, I was short on both sides, just a few inches, so I took the trimmings of the top that I had just cut off and placed and pinned along both sides as needed


I didn't get a picture of the sewing but I'm sure you can imagine. I took both the top and bottom and straight stitched along the outside of my pins, trimmed any access fabric, turned the top right side and headed back outside, fabric pieces in tow.
Heres the fun part, no really, I wasn't thinking before I started this project.
I swear we have a staple gun..... oh where oh where can it be........
If you have one, great! These next steps will fly right by.
If not, well then get to digging for teeny tiny little nails and a hammer.
(see, I said dig and dig is what I did)

just for these little guys

Here is another option, not mandatory at all, but helpful, yes.
Basting spray (my new favorite "tool")
I sprayed the bottom seat before placing the fabric to help stable it while I pulled and tucked and nailed.

see how nice and flat and clean that looks

Time to flip and get to work,
I pulled folded and nailed in the center of each 4 sides

Then at the corners I tucked and folded left and right and nailed them in place, creating this triangle extra piece around the corners

I cut off a few inches
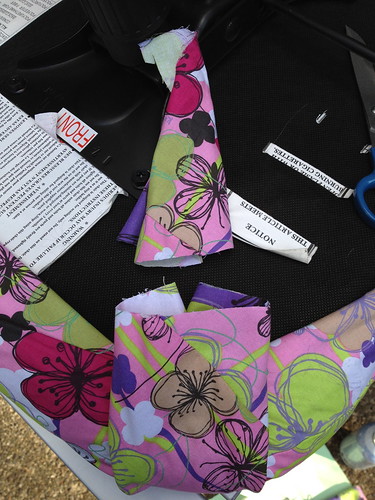
Then tucked and nailed the corners
(yes I know my nails are bent, the under side of the chair did not like me or my nails)
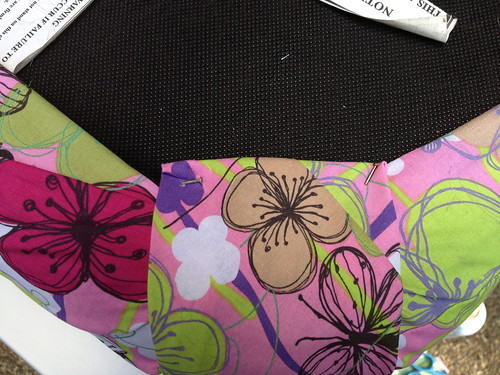
Repeat all 4 bottom seat corners and...wala...
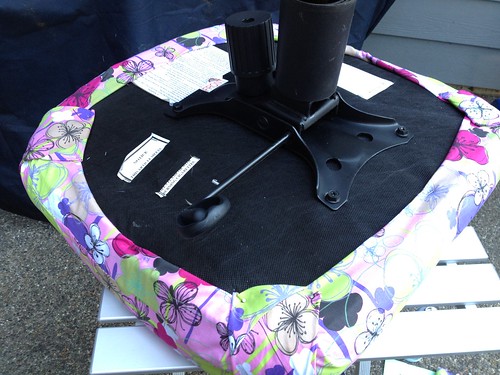
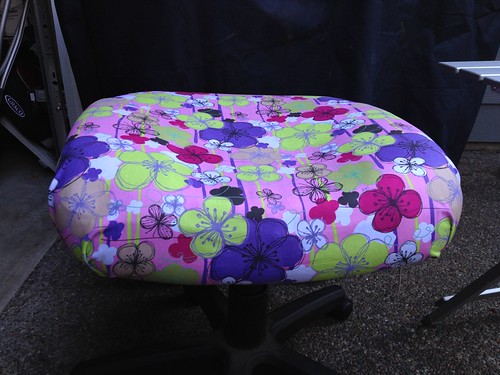
Don't forget to make and puncture the holes for the arms
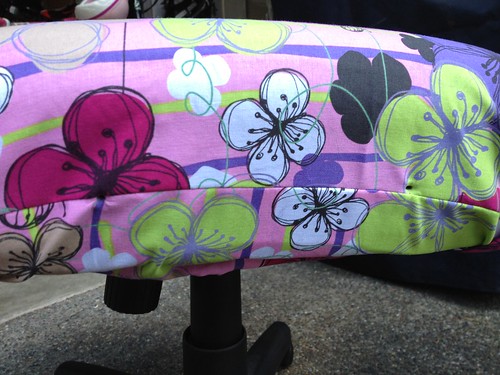
Back to the top, slip on the cover and adjust the folds around the top corners, making sure the back is flat to
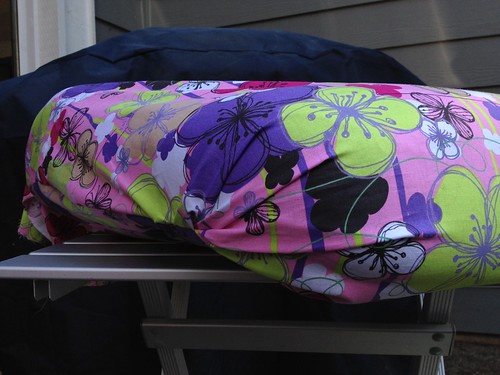
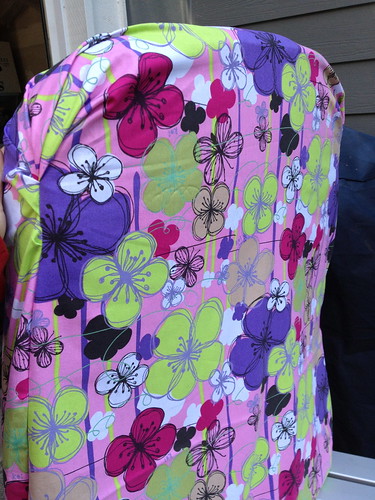
Lay top on its back, tuck the back under and inside
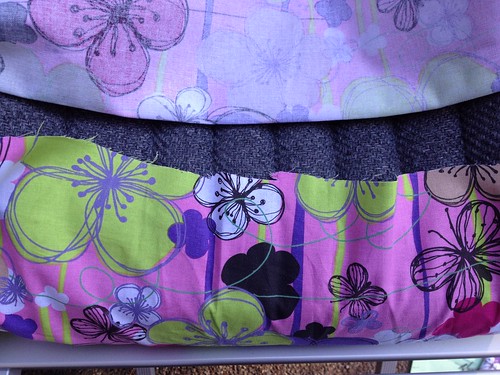
If you have the basting spray, you can spray the top down now for a little stability while nailing the final tucks in

Pull the top down nice and smooth, tuck and fold and place over the bottom tuck, nail in the center


On the two bottom corners I pulled and folded similar to the top corners, not worrying to much because they will be hidden, I didn't even cut off any extra I just tucked it in and nailed


Again make the holes for the screws (I just stuck a pencil in them)

Add your arms back on,
TADA!!!
I most fabulous looking office chair ever, J/K :-P


Saturday, September 15, 2012
Half Apron
Just for me :-)
It's not to often I sew for myself, family, or home.
Tonight after I finished up what was on the sewing table I got to thinking about the craft fair I have next weekend realizing I didn't have an apron. I had borrowed my booth partners last year.
So with 3 FQ and about an hour or so, I present to you......
Sellers Half Apron ~ Worked up in Sweet Stitches
Buttons, Stitches and Patterns~ Oh My!
(featured on a child size model does it no justice)
22in wide and 11in long and has 3 front pockets
Tutorial to come soon
And just for fun, here's what I'll be wearing
Subscribe to:
Posts (Atom)


